


Set Up Your Website with Dreamweaver CS4's Site Manager
- Start up Dreamweaver.
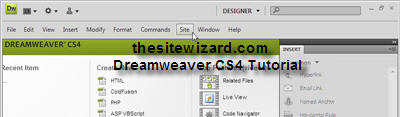
Near the top of the window is a menu bar with the words "File Edit View Insert Modify Format Commands Site Window Help". This menu bar allows you to access many of Dreamweaver's features. We will be using this menu bar extensively in the course of the tutorial.
3. To create a website that you can manage using Dreamweaver, the first thing you should do is to invoke the Site Manager. To do this, click "Site" in the menu bar. When the drop-down menu appears, click the "New Site..." item on that menu.
4.A dialog box box will appear with a title bar that reads "Site Definition for Unnamed Site 2". The actual number that follows the word "Site" may be different if you have ever used Dreamweaver to set up a site before. Don't worry about that. You are about to change it anyway.
If you were to look at the top of the dialog box, you will see two tabs: the "Basic" and the "Advanced" tab. You should currently be using the "Basic" tab. If this is not true, click the "Basic" tab to select it. If you don't know which is currently selected, click the "Basic" tab to be sure.
In the main part of the dialog box, you should be able to see a field just under "What would you like to name your site?" This is where you enter your website's name. If you're not sure what to call your website at this point, and you have already registered your own domain name, simply enter your domain name here. For example, if you have bought a domain called "example.com", enter "example.com" (without the quotation marks) into the box. If you're creating a company website, enter your company name instead. Don't worry too much about this field: it's merely for your own personal reference in case you create many websites and need to distinguish between them. The words typed here won't appear on your site.
For the purpose of this tutorial, I will assume that you have typed "Example Company" into the box. However, there's no need for you to use this name just because you're following this tutorial. Use your site's real name.
Underneath your site's name is a field for you to enter the web address of your website, following the question "What is the HTTP Address (URL) of your site?". If you have bought the domain "example.com", enter your website address as "http://www.example.com/" (without the quotes), unless your web host tells you otherwise.
Once you've finished entering the above two fields, click the "Next" button at the bottom of the window.
5. In the next screen that appears, accept the default "No, I do not want to use a server technology" and click the "Next" button again.
6.The next window that appears lets you to control where Dreamweaver saves the files you create. The default is to place the files in a folder with the same name as your website. You can change the location if you wish. Note that this folder merely determines where on your computer the website files are saved. You will be taught how to publish those files to your web host in a later step. You should always keep a copy of your website on your own computer. If you don't know what to do here, just accept the default and click "Next".
7.When the window with the question "How do you connect to your remote server?" appears, click the down arrow in the drop-down box and select "None". You will change this later when you publish your site, but for now, selecting "None" allows you to quickly get started with your site with minimum fuss. Click the "Next" button
You will then be presented with a "Site Definition" summary. Click "Done".
0 Response to "Set Up Your Website with Dreamweaver CS4's Site Manager"
Post a Comment